You start the solar panel installation by setting up a meeting. Next, you check your property. Then, you design the solar energy system. You get permits after that. You buy the equipment. You install the solar panel system. Finally, you turn on solar power. Many homeowners use this guide to help save energy and money. They also want to use clean energy. The process begins when you find a solar panel installer. You decide if solar panels are good for you. You learn how many solar panels you can use. Solar technology gives renewable energy. It also helps you estimate solar savings. Most people want a professional to install their panels. But some people try diy solar panel installation.
Description
Value
Total solar installations in the U.S.
5 million
Percentage of residential installations
97%
Installing solar panels on your roof takes one or two days.
The whole process from start to finish can take weeks or months.
Key Takeaways
Begin the solar panel installation by talking to a professional. They will check if your home can use solar energy. Make sure your roof is strong and in good shape. Get all needed permits and approvals from local offices and utility companies. The workers will set up the racking system first. Then, they will mount the panels. Next, they connect the wiring and inverter. This work usually takes one to three days. After everything is done, there will be a final inspection. You also need utility approval before turning on your solar system. This lets you start making clean energy. Clean the panels and check how they work often. This helps your solar system work well and last longer.
Initial Consultation and Assessment
Project Feasibility
You start your solar installation project with an initial consultation. This meeting helps you and your solar panel installer decide if solar is right for your home. The installer will ask about your energy needs and look at your property. They want to know how much electricity you use each year and if your roof can hold solar panels. Here are some common factors they check:
Your yearly electricity use in kilowatt-hours (kWh)
How your energy use changes during the year
The age and strength of your roof
The direction and slope of your roof
How much space is available for panels
If trees or buildings cause shade
If your electrical panel can handle the new system
This step helps you see if solar panel installation will save you money and energy.
Site Survey
After the first meeting, the installer visits your home for a site survey. They measure your roof and check for any problems. They look for things that might block sunlight, like trees or nearby buildings. The installer also checks your electrical system to make sure it works with solar. This survey helps them design the best system for your home.
Homeowner Preparation
You can help the process go smoothly by getting ready for the site survey. Here are some tips:
Make sure your roof is safe and in good shape.
Learn about how solar panels fit on your roof and how much space you have.
Check if you need special permission to install solar, especially if you live in a special area.
Write down questions for your installer, such as:
How do you estimate my savings?
How much energy will I use or send to the grid?
How do you handle shade and roof direction?
What warranties do you offer?
Get quotes from more than one installer to compare options.
Tip: Good preparation helps you get the most from your solar installation project.
Solar Panel Installation Process Design
System Design
The installer uses the site survey to make a plan for your solar power system. They decide how many panels you need and where to put them. They also pick the right equipment for your home. The system should fit your energy needs and roof size. The installer thinks about these main parts:
Solar panels: These take sunlight and make electricity.
Inverter: This changes the electricity so you can use it at home.
Mounting system: This holds the panels on your roof for the best sunlight.
Battery storage: This saves extra energy for later or for backup.
Charge controller: This keeps your batteries safe from too much power.
Monitoring system: This shows how much energy your system makes.
The installer also checks how well the panels work. They choose the right inverter and mounting system for your roof. They plan the wires and safety parts.
Proposal Review
You get a proposal that tells you about the solar panel installation and your system. Read the proposal carefully. Look for these things:
Make sure your roof is in good shape and does not need fixing soon.
Check if your electrical panel can handle the new system.
Read about the equipment and rules. Everything should be clear.
Tip: Ask questions if you do not understand something in the proposal. A good installer will help you learn about each part.
Contract Signing
Before you sign, read the contract very closely. Look for these things:
Transferability: The warranty should move to a new owner if you sell your house.
Labor reimbursement: The warranty should pay for repair work.
Exclusions and limitations: Read about risks like fire or storms.
Company reputation: Pick an installer with a good history and easy claims.
You should also check the contractor’s license and look at their ID. Call the Contractors State License Board to make sure they are allowed to work. A good installer helps your solar panel installation go well and keeps your system working for a long time.
Permitting and Paperwork
Local Permits
You must get a few permits before you start solar panel installation. These permits keep your home safe and make sure you follow local rules. Most cities want you to get building and electrical permits. Building permits check if your roof is strong enough for panels. Electrical permits make sure your wiring is safe. Some places also need a utility interconnection permit. This permit lets your solar system connect to the power grid.
Permit Type
Primary Purpose
Typical Timeline
Building Permit
Structural Safety
2-4 weeks
Electrical Permit
Code Compliance
1-3 weeks
Utility Interconnection
Grid Integration
4-8 weeks
New York’s solar permits help protect your investment. Every solar installation must meet strict safety and quality rules. This process keeps you safe and helps the power grid work well.
HOA and Utility Approval
If you live in a neighborhood with a homeowners association (HOA), you need their approval. HOAs have rules about how solar panels look and where you can put them. You should check these rules before you begin. Utility companies also need to approve your system. They want to make sure your solar panels connect safely to the grid. You must fill out forms and wait for them to check your system.
Building Permits: Make sure your roof is strong and follows local rules.
Electrical Permits: Make sure your wiring is safe.
Utility Interconnection Applications: Let your system connect to the grid.
NLR’s study shows that approval times are different in each city. Some cities use SolarAPP+ to make the process faster. This tool can review permits in less than a day.
Avoiding Delays
You can avoid delays by getting your paperwork ready early. Gather all your documents before you apply. Check your forms for mistakes. Ask your installer about local rules and how long things take. Some cities take weeks to review permits. Others use fast online tools. You should keep track of your application. Acting quickly helps you finish permits and approvals faster.
Tip: Start your paperwork as soon as you decide to get solar panels. Getting ready early helps you move through the process easily.
Equipment Procurement
Ordering Panels and Components
You start by picking the right panels and parts for your solar project. Your installer helps you choose brands that match your energy needs and budget. Many people like to use brands they can trust for their solar systems. You can look at some popular choices in the table below:
Brand
Key Features
SolarEdge
Integrated EV charging, 200% oversizing capacity.
Enphase Energy
Microinverter redundancy prevents total system failure.
Tesla Powerwall 3
Fully integrated inverter and battery for high-load starting.
SMA Sunny Boy Smart
Hybrid design with dedicated "Secure Power" outlets.
Fronius Primo
Exceptional thermal management for sustained high-wattage charging.
You should talk to your installer about what each brand offers. Some systems give backup power or let you watch your energy use. Others are made to last longer or work better.
Delivery Timeline
After you order your solar panels and parts, you wait for them to arrive. Most equipment comes in 1 to 4 weeks. If your installer has panels in stock, you might start sooner. Sometimes, special equipment takes longer to get to you. You may need to change your plans if there are delays. Here are some things to remember:
Delivery usually takes 1 to 4 weeks.
In-stock equipment helps you start faster.
Custom orders can slow things down.
Scheduling the installation may add another week.
Note: You can ask your installer for news about delivery and when you can start. Knowing what is happening helps you get ready for the next steps.
Quality Assurance
Before the installation, your installer checks the equipment for quality. These checks make sure your solar equipment is safe and works well. You can see the types of checks in the table below:
Type of Inspection
Purpose
Pre-Production Inspections
Approve project plans, ensure materials availability, and compliance with building codes.
Verify adherence to industry best practices and quality standards throughout the project lifecycle.
You should ask your installer about these checks. Quality checks help protect your money and make sure your solar system works the right way.
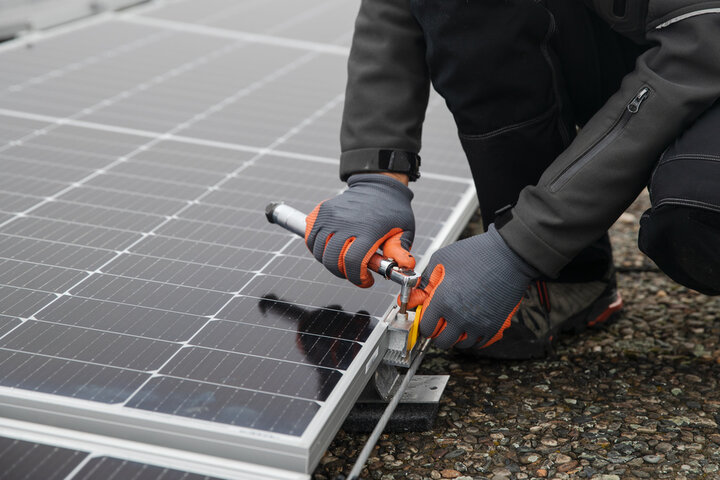
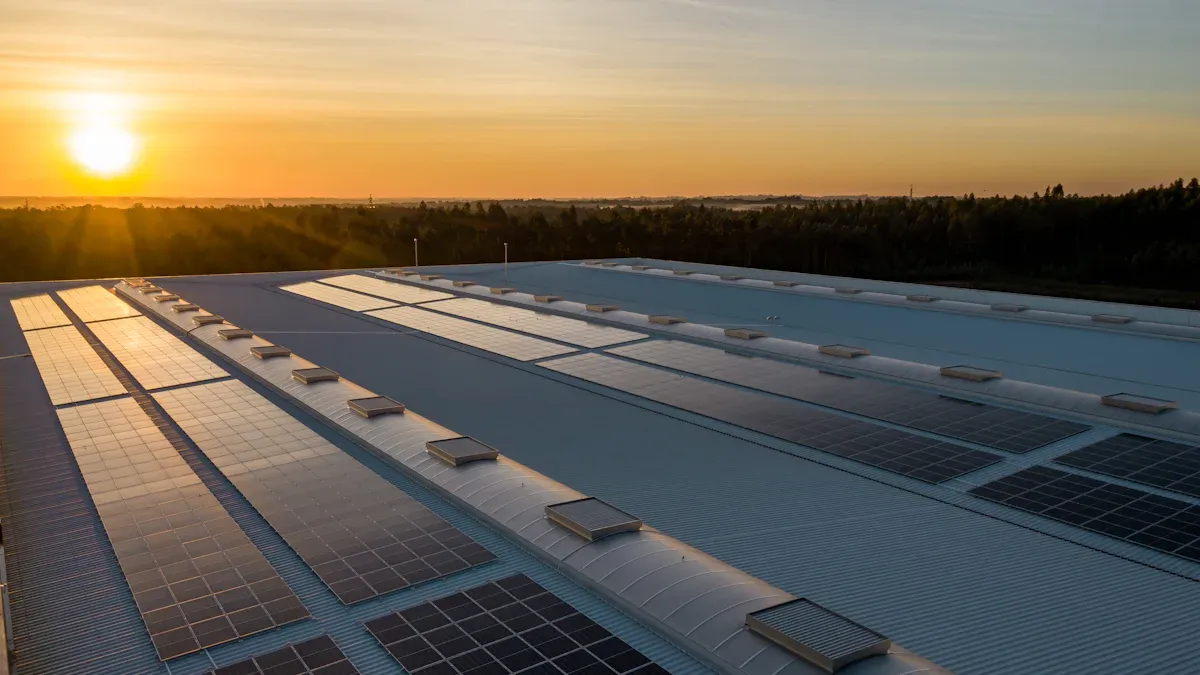
Installation Process
The installation process is the most exciting part. You get to see your solar panels put on your roof. Most crews finish the job in one to three days. The time depends on how big your system is. It also depends if you add batteries. The crew comes early and works carefully through each step.
Racking System Setup
First, the crew sets up the racking system. This holds your solar panels in place. Installers follow strict rules to keep your roof safe. They want to stop leaks. Here is what they do:
They find and mark where your roof rafters are.
They bolt flashings to the rafters at each spot. Flashings stop water from leaking into your house.
They attach racking rails to the flashings. These rails hold up your solar panels.
Installers use strong lag bolts that go deep into the rafters. They check every connection to make sure it is strong. These steps help your system pass local rules. Most homes do not need an engineer if you follow these steps.
Mounting Solar Panels
After the racking is ready, the crew puts on the solar panels. Safety is very important during this step. Installers use roof brackets to spread out the weight. This keeps your shingles safe. They use gutter shields to protect your gutters.
Installers must:
Flash and seal every hole in the roof to stop leaks.
Leave clear paths for fire fighters.
Attach the mounting system the way the manufacturer says.
Put down plywood to protect your yard.
Put up signs that show the power source and voltage.
Inspectors need safe paths to check the roof. The crew puts each solar module on as the plans say. They make sure everything follows the rules.
Wiring and Inverter Connection
Next, the crew does the wiring and sets up the inverter. This step connects your whole solar system.
They wire the panels together in a row. They use weatherproof connectors. The wires go down to the inverter, usually near your main panel.
They put the inverter on a wall in your garage or outside. Some systems use microinverters on each panel.
The crew follows safety rules and best practices. They check every wire and connection. They make sure the system is ready for inspection.
Installation Tips
You can help make your installation safe and easy. Here are some tips to help you:
Tip
Description
Professional Installation
Hire professionals. They know the safety rules. They keep your warranty safe. DIY work can cause problems with permits and insurance.
Understanding Permitting
Learn about your local permit rules. This helps you avoid delays. Good installers know how to handle these steps.
Warranty Awareness
Read your warranty. This protects your money and helps you fix problems later.
Work with local installers who know your area’s rules.
Ask questions about each step of the process.
Keep your paperwork in order so you can find it later.
Note: Working with skilled professionals makes your solar installation safer and easier.
Now you know the main steps of the installation process. Careful planning and skilled work help your solar project succeed.
Inspection and Grid Connection
Final Inspection
After your installer finishes putting up the solar panels, you have a final inspection. Inspectors come to your house to check if everything is safe and works well. They look for problems that can make your solar panels work less. These problems include dirt or leaves on the panels. Bird droppings can also block sunlight and lower power. Wires that are broken or loose can stop energy from moving right. If the inverter does not work, your system cannot make electricity for your home. Cracked or broken panels make less energy. Shade from trees or buildings can block sunlight. Over time, panels can get old and not work as well. Inspectors make sure your system follows local rules and safety laws. If they find a problem, ask your installer what to do next.
Utility Approval
When you pass the inspection, you need the utility company to say yes. You must fill out a form called an interconnection application. This form asks about your energy use, your roof, and how your system is built. The utility checks to make sure your solar panels will not hurt the power grid or workers. All solar PV systems must follow local rules and get utility approval before you turn them on.
Note: You need utility approval to use your solar system and send power to the grid.
Homeowner Role
You have a big job during this part. You must make sure your solar system follows all the rules and is safe. You may need to talk with your installer and the utility company. Sometimes you fill out forms or tell the utility when your system is ready. You should know what papers and info your utility wants. You might need to do an energy check before you get solar. If you stay organized, you can get money back and switch to solar easily.
Tip: Keep all your papers and remember important dates. Talking often with your installer and utility company helps you finish faster.
System Activation
Turning On Solar Power
Turning on your solar system is the most exciting part. Before you use solar power, you need permission from your utility company. This means your system passed all checks and is safe. When you get permission, you can turn on your system by doing these steps:
Flip the PV solar breaker switch in your electric panel.
Turn on the AC disconnect.
Switch on the solar inverter.
Your installer might help you set up net metering and program your bi-directional meter. This lets your system send extra electricity back to the grid. Now your solar panels start making energy for your home.
Performance Check
After you turn on your solar system, you should check if it works right. Look at some important things:
Energy production (kWh): See how much electricity your panels make.
Inverter efficiency: Make sure your inverter changes power well.
System availability: Check that your system stays on and working.
Shading and soiling loss: Watch for dirt or shade that lowers output.
Fault detection: Look for any errors or warnings from your monitoring system.
Your installer may show you how to use a monitoring app or website. This tool helps you watch your system and find problems early.
What to Expect
When your solar system starts, you will see changes fast. Your home uses clean energy from the sun. You may see your utility bills go down as you use less electricity from the grid. The monitoring system lets you see your energy production in real time. You might get a short lesson on how to read your system’s data and alerts. If you notice any problems, call your installer for help.
Tip: Watch your system’s performance, especially in the first few weeks. Checking early helps you fix small problems before they get bigger.
Post-Installation Support
Monitoring System
When your solar panels start working, you need to watch how much energy they make. There are different ways to check your solar power. Some systems connect the inverter to a computer. Others use a screen that shows data from all your inverters. Many people like online monitoring because you can see your energy use on the internet. You can pick a system from the equipment maker, your installer, or buy a home energy monitor.
Type of Monitoring System
Description
Manufacturer monitoring
Lets you track each solar panel’s performance.
Installer-provided monitoring
Custom system set up by your solar provider.
Standalone home energy monitors
Works with any system to show energy use and production.
System-level monitoring gives you a simple look at your system. Module-level monitoring lets you see how each solar panel is doing.
Some popular brands are Enphase, SolarEdge, and SMA. You should check your monitoring system often to find problems early.
Maintenance
You keep your solar panels working well by taking care of them. Clean the panels and take off leaves or dirt so they get sunlight. Look at the wires and mounting parts to see if anything is loose or broken. Plan for a full system check every year to find problems before they get worse.
Clean panels and remove debris.
Inspect wiring and mounting hardware.
Schedule yearly system inspections.
Watch for drops in energy output.
In one study, panels not cleaned for eight months lost 32% of their energy because of dust.
You can ask your installer about maintenance and monitoring plans. These services help your solar system last longer and work better.
Warranty and Support
Good warranties help you feel safe about your solar equipment. Most solar panels have a warranty for 10 to 25 years. String inverters usually last 10 to 15 years. Microinverters can last up to 25 years. Solar batteries often have warranties for 10 to 15 years. Mounting equipment also comes with long-term protection.
Component
Warranty Length
Performance Guarantee
Solar panels
10-25 years
At least 80% of original output, 85%+ for premium equipment
String inverters
10-15 years
At least 90% energy conversion efficiency after 10 years
Microinverters
25 years
At least 80% energy conversion efficiency after 25 years
Solar batteries
10-15 years
At least 70% of original battery storage capacity
Mounting equipment
10-25 years
N/A
If you have a problem, call your installer or the manufacturer. Many companies give support and repairs during the warranty time. You should keep all your papers in a safe place.
Tip: Read your warranty so you know what is covered and how to get help if you need it.
You can use this guide to learn how solar panel installation works. First, you decide if solar panels are a good choice for your home. Next, you find an installer and learn about solar technology. The installer looks at your house and makes a plan for your solar energy system. You and your installer go through each step together. When you install solar panels, you get renewable and sustainable energy. This helps your system work better and lowers your bills. You can install solar panels yourself or hire a professional. Start now to enjoy the benefits of solar power.
Learning each step and asking questions makes things easier. Solar power helps you have a better future.
FAQ
How long does solar panel installation take?
The installation takes one to three days. Getting permits and inspections takes longer. The whole process can last weeks or months.
Do solar panels work on cloudy days?
Solar panels make electricity even when it is cloudy. They make less energy than on sunny days. You still get power for your home.
Will solar panels damage my roof?
Professional installers use special mounting systems. These systems protect your roof from leaks and damage. Your roof stays safe during installation.
What maintenance do solar panels need?
Clean your panels a few times each year. Check for leaves or dirt on them. Plan a yearly inspection to keep your system working well.
Can I install solar panels myself?
You can try to install solar panels yourself. Hiring a professional is safer and gives better results. Most people choose experts for this job.

 Español
 Deutsch
 italiano
 Nederlands
 English
 Français
 Português
 日本語
日本語 한국어
한국어 Tiếng Việt
 ไทย
ไทย Türkçe
 ဗမာစာ
ဗမာစာ Filipino
 Bahasa Indonesia
 magyar
 Српски
 हिन्दी
 فارسی
فارسی Slovenčina
 Slovenščina
 Norsk
Norsk Svenska
 українська
 Ελληνικά
 Հայերեն
 Dansk
Dansk Shqip
Shqip বাংলা
বাংলা Hrvatski
 Gaeilge
 Eesti keel
 Oʻzbekcha
 latviešu
 Azərbaycan dili
 Беларуская мова
 Български
 ქართული
 ʻŌlelo Hawaiʻi
 Kinyarwanda
 Кыргызча
 Oluganda
 Lëtzebuergesch
 Cymraeg